


2PCS Chevrolet Corvette Curved Brake Caliper Decals
2PCS Chevrolet Corvette Curved Brake Caliper Decals
Low stock: 5 left
Couldn't load pickup availability
We ship decals the same day or the next business day after the order is placed.
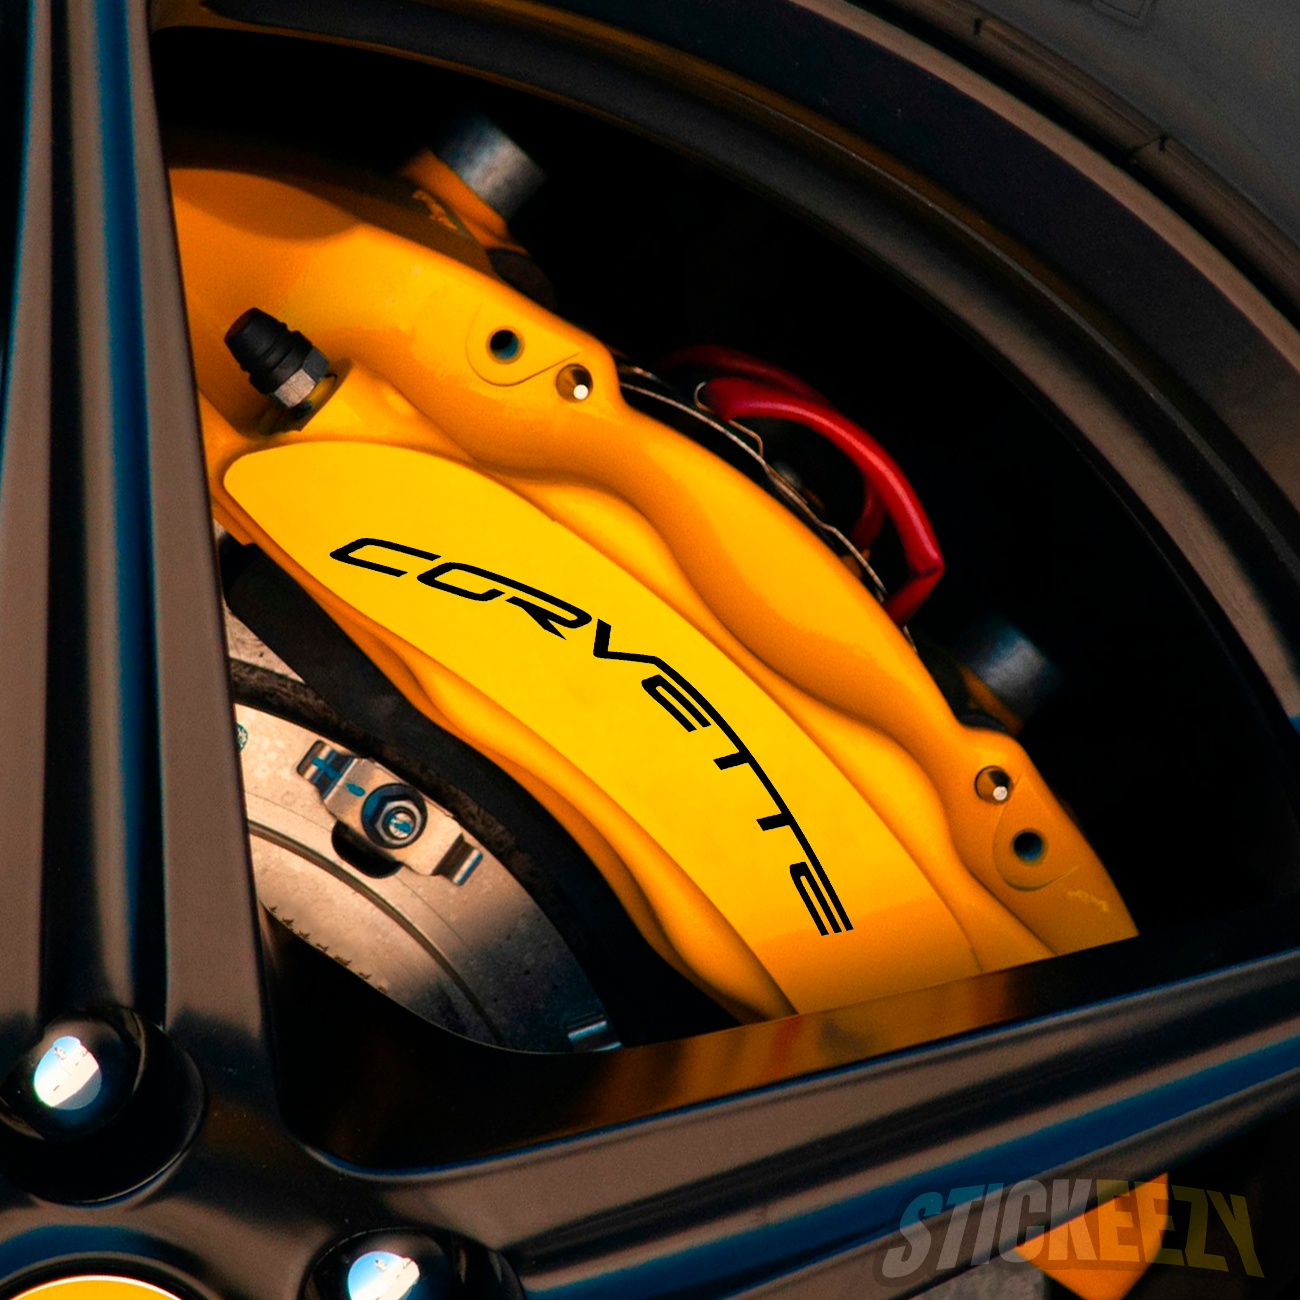
Chevrolet Corvette Curved Brake Caliper Decals are designed to follow the natural shape of curved brake calipers, creating a clean and precise performance look inspired by Corvette styling. Made from premium automotive-grade vinyl, these decals are engineered to withstand high brake temperatures, UV exposure, road debris, and regular washing while maintaining sharp edges and strong color contrast. The curved layout allows the decal to sit smoothly along the caliper surface for a more integrated, factory-style appearance. While optimized for curved brake calipers, the decals can also be applied to any smooth automotive surface, including body panels, trim, mirrors, or interior accents. A bold styling upgrade for Corvette enthusiasts who want a precise performance detail with long-lasting durability.
We strongly recommend applying a clear coat when installing on brake calipers.
Key Features:
- Each order includes two decals
- Die-cut no background decals.
- Made from premium Oracal 651 Vinyl
- Decals measured by width (see photos for exact size)
- Height adjusted automatically to keep original proportions.
- We recommend Apply in 50–90°F (10–32°C) temperature
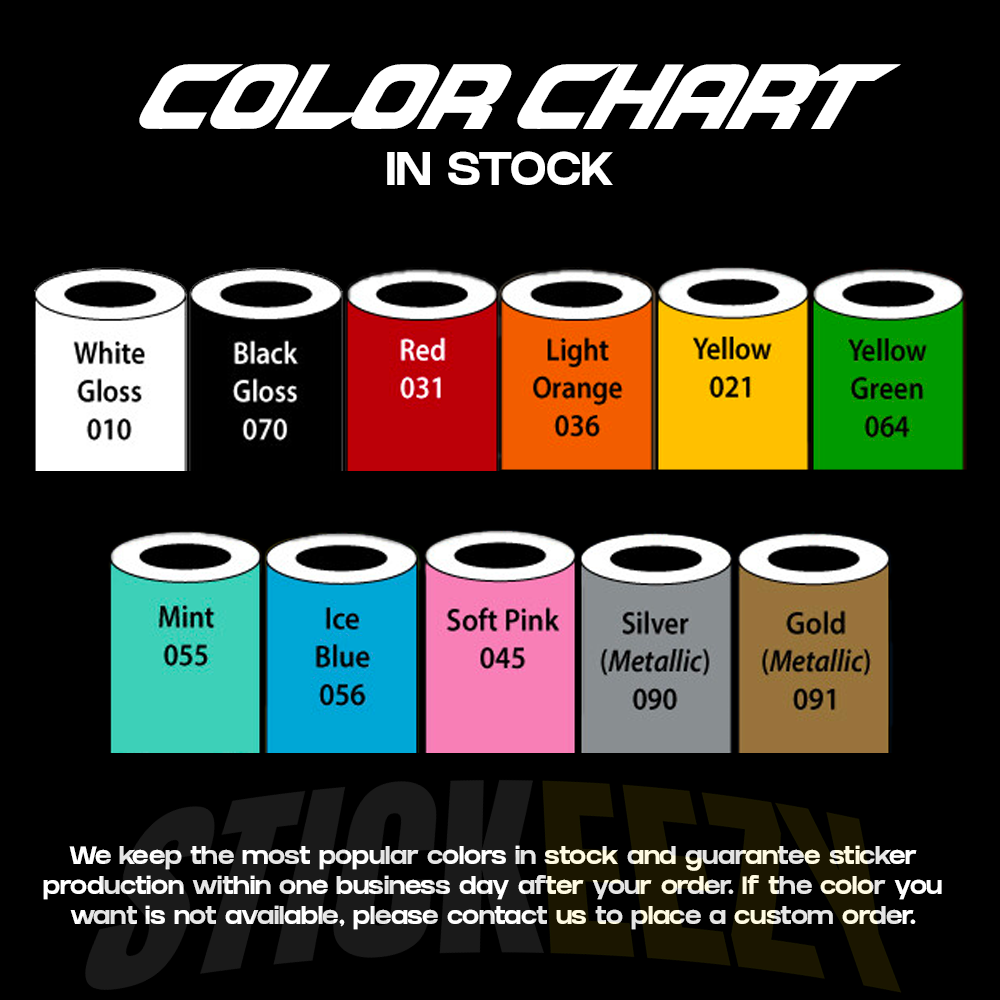
- Color and other customization available!
- If you can’t find the design you need — contact us directly, we’ll make it!
- This product is an aftermarket, handmade decal and is not an original OEM part.
Brake Caliper Decal Application Instructions
1. Clean the surface
Thoroughly clean the brake caliper to remove dirt, grease, and brake dust. The surface must be completely clean and dry.
2. Prepare the surface
If the caliper was freshly painted, allow the paint to fully cure before applying the decal.
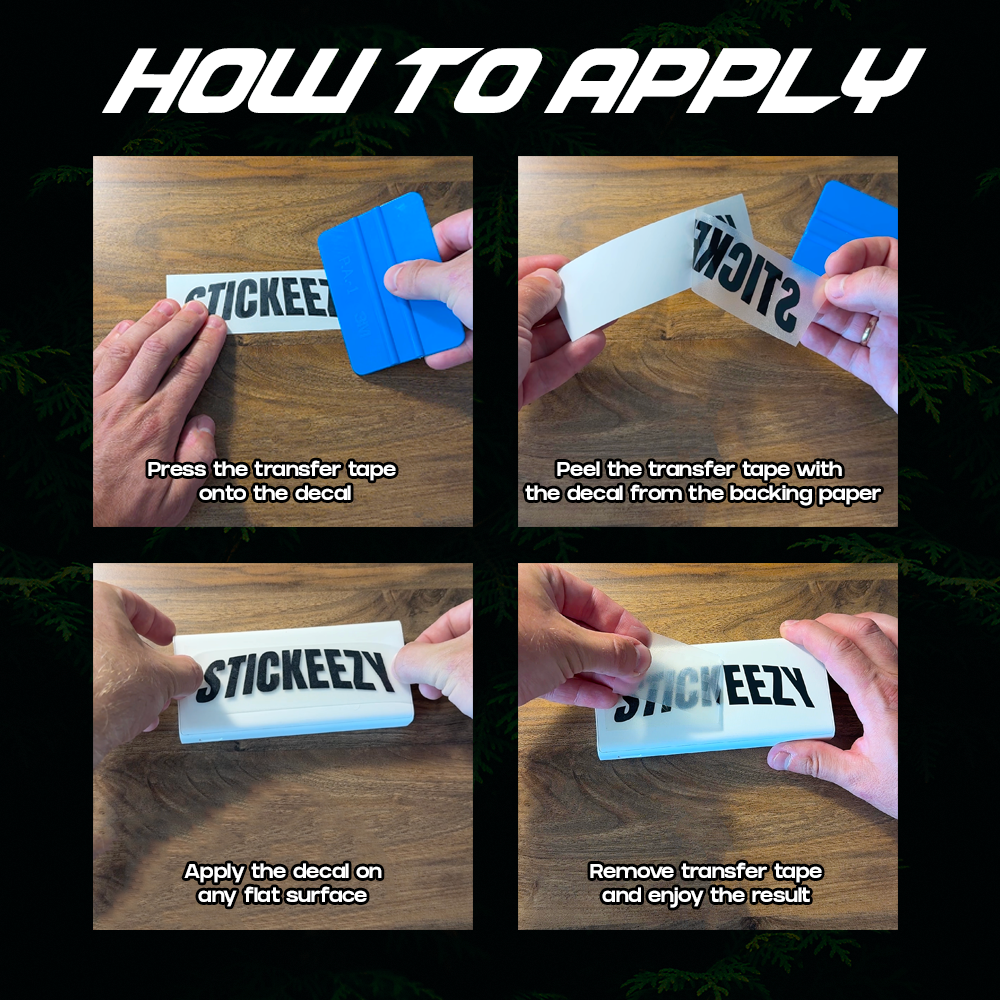
3. Remove the paper backing
Carefully peel off the paper backing from the decal, leaving the decal attached to the transfer tape.
4. Apply the decal
Place the decal onto the painted caliper and press it lightly so it stays in position.
5. Check positioning
Make sure the decal is aligned correctly.
6. Smooth the decal and remove transfer tape
Firmly smooth the decal using a plastic card or squeegee to remove air bubbles. Then carefully peel off the transfer tape, leaving the decal on the caliper.
7. Apply clear coat
Apply several layers of high-temperature clear coat over the decal to protect it and ensure long-term durability.
⚠️ Important:
These decals are not designed to be baked in an oven. Apply them at normal temperature and seal them with clear coat.
What is transfer tape:
Transfer tape is a transparent application film placed on top of the decal that holds all letters and elements in position while transferring them to the surface. After the decal is applied, the transfer tape is carefully removed.
Share


- Choosing a selection results in a full page refresh.
- Opens in a new window.