


Audi RS Brake Caliper Stickers Fits Audi | Vinyl Decal Set
Audi RS Brake Caliper Stickers Fits Audi | Vinyl Decal Set
Low stock: 8 left
Couldn't load pickup availability
We ship all decals the same day or the next business day after your order is placed.
MEASURING YOUR BRAKE CALIPERS BEFORE ORDERING IS STRONGLY RECOMMENDED. Please review the product photos for exact decal dimensions before purchase.
Each order includes 2 brake caliper decals.
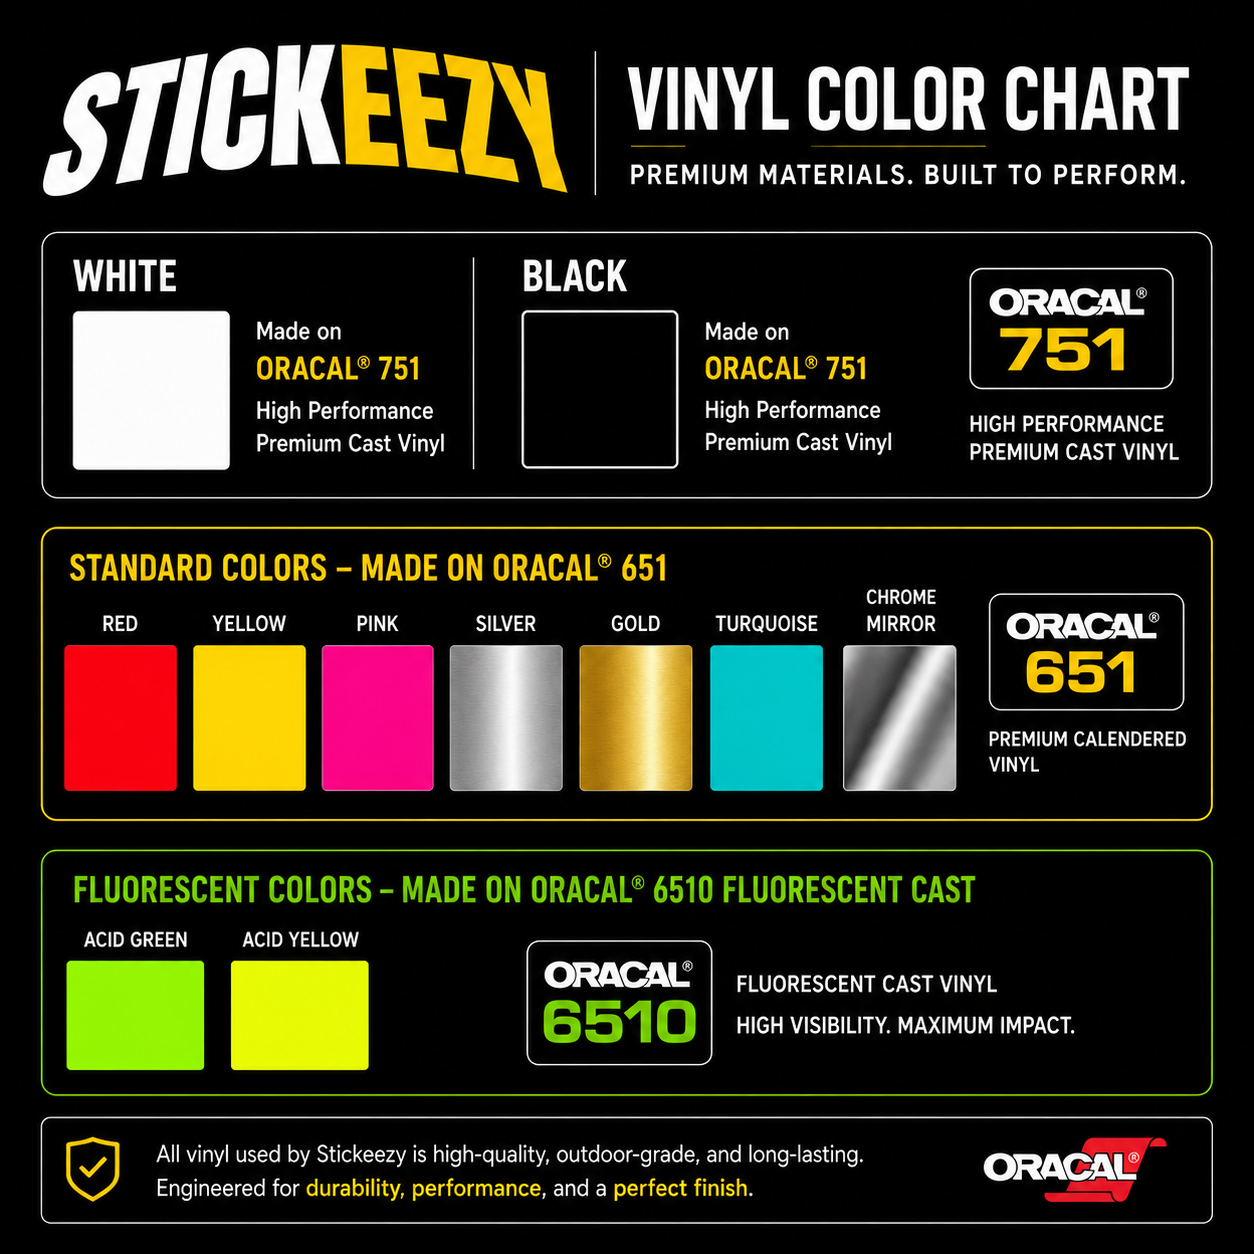
Designed for Audi RS enthusiasts who want to emphasize the aggressive character of their vehicle, these premium brake caliper decals add a bold performance-inspired detail to your braking system. Precision-cut from genuine Oracal 651 automotive-grade vinyl, they deliver crisp lines, strong adhesion, and long-lasting durability for both factory and custom-painted brake calipers.
Inspired by Audi’s renowned RS performance lineup, these decals help create a clean motorsport-style appearance while maintaining a refined factory-inspired look. The die-cut design features no background, giving the decals a professional painted-on finish that blends seamlessly with most caliper colors and brake upgrades.
Suitable for a wide range of brake caliper applications, these decals offer an easy and affordable way to personalize your vehicle without permanent modifications. Engineered for automotive use, they are weather-resistant, car wash safe when properly installed, and built to withstand everyday driving conditions.
Whether you’re finishing an RS-inspired build, refreshing worn calipers, or adding subtle performance styling to your Audi, these decals provide a simple upgrade that enhances the overall appearance of your vehicle.
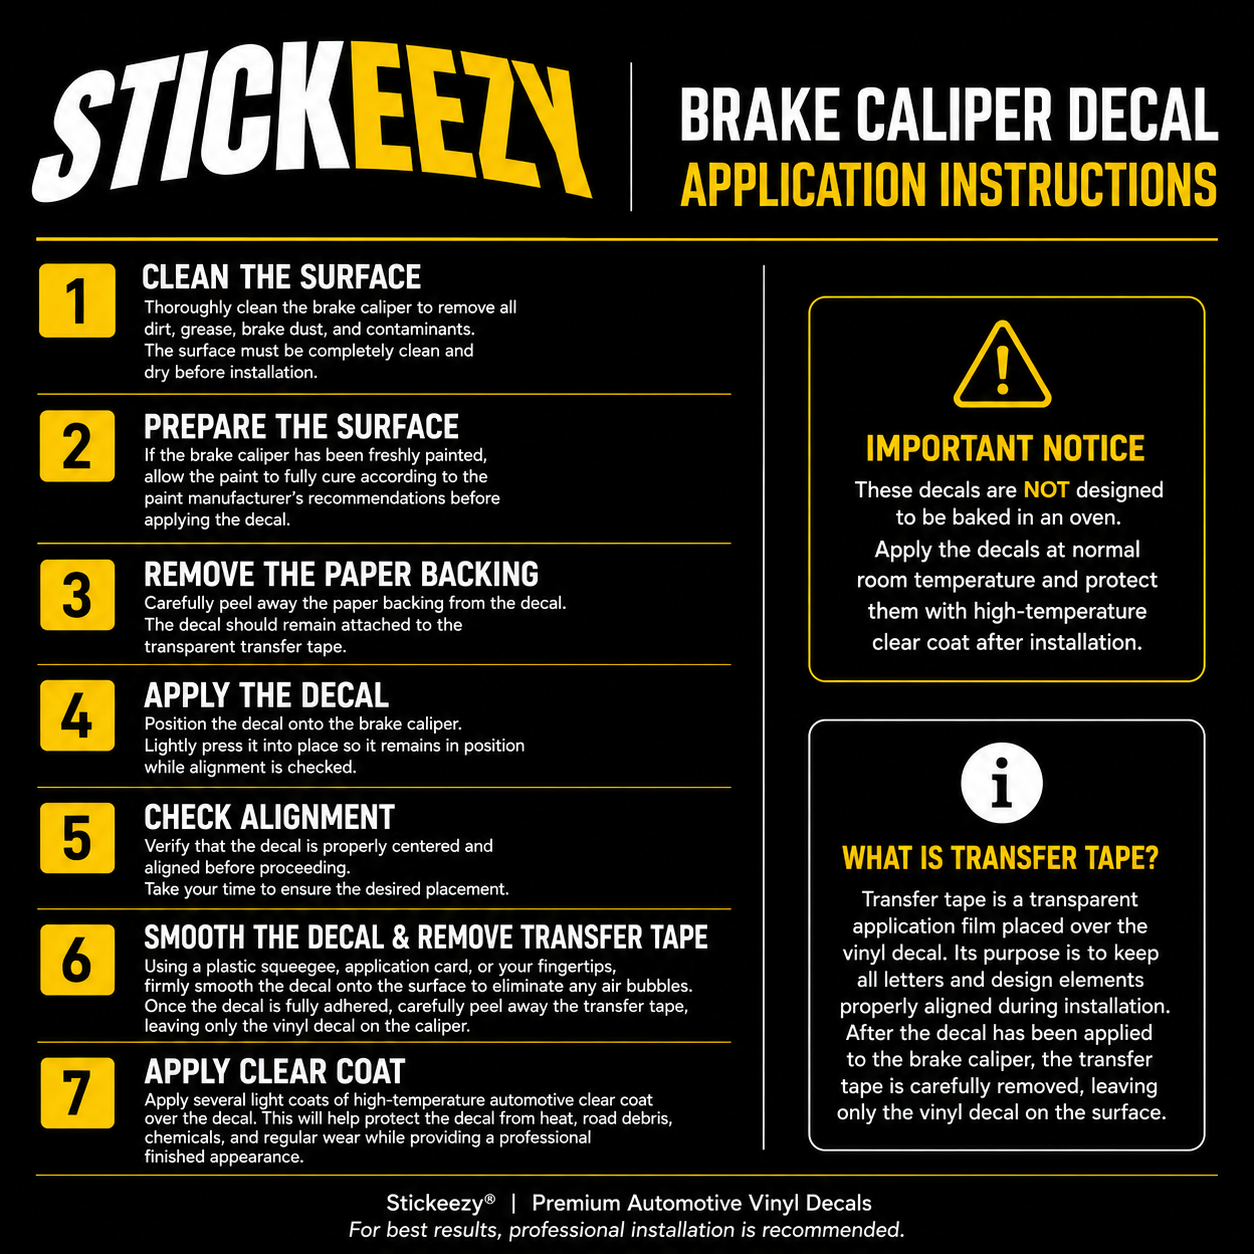
For maximum durability on brake calipers, applying a high-temperature automotive clear coat after installation is strongly recommended.
Key Features:
• Each order includes 2 decals
• Precision die-cut design with no background
• Made from premium Oracal 651 vinyl
• Automotive-grade outdoor durability
• Decal size measured by width (see photos)
• Height automatically adjusted to maintain original proportions
• Recommended application temperature: 50–90°F (10–32°C)
• Multiple color options available
• Custom sizing available upon request
• Handmade aftermarket product, not an OEM part
Can’t find the logo or design you’re looking for? Contact us and we’ll be happy to create a custom decal for your project.
Share


- Choosing a selection results in a full page refresh.
- Opens in a new window.